Lascar EL-USB-ULT-LCD - Enregistreur de données USB avec écran LCD et sonde de température cryogénique ultra-basse
Cambiar moneda
Enregistreur de données USB EL-USB-ULT-LCD avec écran LCD et sonde de température cryogénique ultra-basse - Enregistreur de données à ultra basse température pour la surveillance des vaccins dans le stockage cryogénique de glace carbonique.
Cet enregistreur de données à ultra-basse température est conçu pour surveiller les vaccins dans le stockage cryogénique de glace carbonique. La plage de mesure est de -100 à +100°C (-148 à +212°F) en utilisant la sonde fournie avec l’enregistreur.
L’appareil peut enregistrer plus de 32 000 lectures et l’écran embarqué peut circuler entre les lectures de température actuelle, minimale et maximale en appuyant simplement sur un bouton. Des lumières clignotantes alertent les utilisateurs de toute excursion de température. L’enregistreur est simple à configurer à l’aide du logiciel gratuit EasyLog, qui permet aux utilisateurs de définir leurs propres seuils d’alarme élevés et bas, avec des fonctions de maintien de l’alarme et de démarrage différé.
Il suffit de brancher l’enregistreur sur le port USB de votre PC pour télécharger des données qui peuvent ensuite être représentées graphiquement, imprimées et exportées vers d’autres applications pour une analyse détaillée.
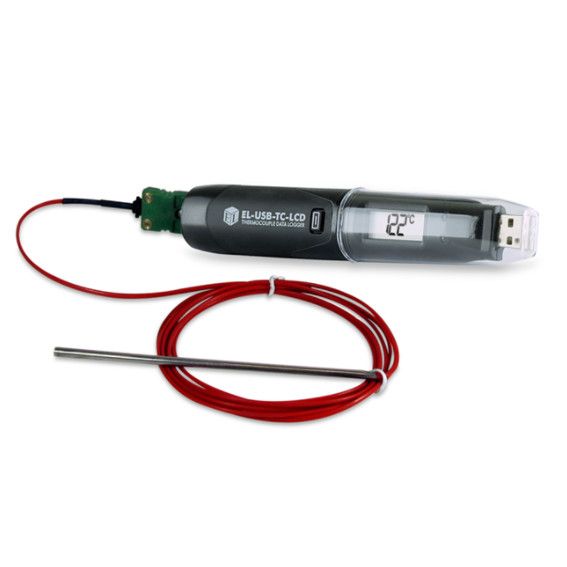
Le produit est fourni avec une pile 1/2 AA, la sonde (sonde de 300mm sur un câble de 1m de long) et un support de montage.
Applications
L’enregistreur de données à ultra basse température EL-USB-ULT-LCD est conçu pour surveiller les vaccins dans le stockage et le transit cryogéniques de glace carbonique.
Spécifications
| Model | EL-USB-ULT-LCD |
|---|---|
| Description Générale | ultra low temperature data logger is designed for monitoring vaccines in cryogenic dry ice storage and transit. |
| Communications Protocol | USB |
| Précision | ±2.5°C (±4.5°F) typical |
| IReadingsnterprétation | 32,510 |
| Resolution | 0.5°C (1°F) |
| Logging Interval | User selectable between 1 second and 12 hours |
| Battery | Supplied with a ½ AA battery. Battery life: 2 years |
| Dimensions | Logger: 135 x 24 x 21mm (5.31 x 0.94 x 0.82"). Probe: 300 x Ø1.5mm x 1m. Cable: 11.8 x Ø0.06" x 39.4" |
| Écart de température | -100 to +100°C (-148 to +212°F) |
| Température de fonctionnement | (logger only) -10 to +40°C (+14 to +104°F) |
EasyLog Data Logger Setup from Lascar Electronics
Learn about Lascar's standalone data logger. This product is equipped with a LCD screen and ranges of temperature, humidity, dew point and probe data loggers. Download the software at http://www.lascarelectronics.com/data-logger/easylogger-software.php Subscribe to our YouTube channel: https://www.youtube.com/channel/UCnPPNTtodIDopvuiMXhKOGQ Download our Data Logger catalogue for free: http://www.lascarelectronics.com/pdf-usb-datalogging/data-logger0852761001443617044.pdf Add us on Facebook: http://www.facebook.com/lascarelectronicsinc/?fref=ts Follow us on Twitter: http://twitter.com/lascarlog In this video I will show you how to setup your USB data logger To begin click “set up and start the USB data logger.” You are presented with a number of options: First, you can give each data logger a unique name- this will help you identify individual loggers quickly. Next, you can choose between degrees Celsius or Fahrenheit. Then choose how often you want the logger to take a reading, you will note with these options in brackets it shows how long it will take the data logger to fill up with data. Once that is complete click next If you have a data logger with a display, you have a few options relating to the display. Firstly, how often do you want to look at the display.You can choose to have the LCD off, on for 30 seconds after you press the button, or on at all times. Choosing to be economic with the use of the display will improve the battery life of the logger. Next you can choose if you want the data logger to stop when it is full or whether you want it to roll over and continue to take readings. If you are simply interested in alarms, then perhaps a rollover option is a better fit for you. If you need to download and save all readings, then programming the logger to stop may be a better option. Once that is complete click next This next page is alarm setup. You are going to set alarms for temperature so click on this tick box here which will allow us to set the high temperatures. Using the scroll down button here choose the appropriate value. You will note to the right hand side, that there is a tick box saying hold, this is a feature that will continue to show an alarm condition even if the temperature has returned to a normal condition. I will do the same for the low alarm, and select the appropriate temperature. Then select hold for both of them. If you wish to not setup temperature alarms leave the boxes unticked and click next . If it is a humidity logger you can do the same for the relative humidity page, but i’m going to leave these for the time being. If you are using one of the thermistor probe loggers there are options for the probe type as well - you just need to make sure that the selection matches the probe type you have. Finally you can set up how you want the data logger to start. You can start with an immediate start, to start when the data logger button is pressed or select delay the start, which allows you to put a set time and date that you want the data logger to begin recording. Once that is complete click Finish and your data logger is now complete, simply click "Ok" to exit. Now you can take the data logger out of the USB port and place it in a desired location as it is ready to start taking data


Nous expédions uniquement dans le monde entier par UPS, mais vous pouvez utiliser votre propre compte de livraison (UPS, DHL, FEDEX uniquement) en sélectionnant cette option lors du paiement.
Vous devrez indiquer votre numéro de compte de livraison dans les notes de paiement lorsque vous choisissez cette option afin d'éviter tout retard de livraison.
Nos frais de livraison sont facturés par zone et sont fixés par UPS. cliquez ici pour consulter l'intégralité de nos conditions de livraison et d'expédition, ou sélectionnez votre pays dans le menu déroulant lors du paiement pour obtenir un coût de livraison précis.